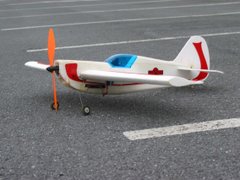
After you have purchased your brand new rc airplane and have followed the directions, such as charging the batteries and "trimming" the elevator and rudder you're ready to FLY! Now you need to find a large field (about the size of a football field) with a well-manicured baseball diamond or a connected parking lot. Check the hourly weather forecast on accuweather.com. Do NOT fly in winds over 3 mph on your first flights. If the flag on the flagpole at the school is moving it is TOO windy.
There are four steps that every pilot most complete to have a successful flight: (1) pre-flight check (2) take-off or hand launch (3) fly at a safe altitude and (4) landing. By far the most challenging step is landing and then taking-off. In this post I will break down each step and tell you what you must do to make your maiden voyage and every flight afterwards a success (but please note: we all crash, no matter if we have been flying for 2 minutes or twenty years. This is a fact and a reality of the hobby).
Pre-Flight Check (in this order):
- Turn transmitter on (put throttle at neutral)
- Turn on plane or plug in battery
- Check the "trim" for the elevator and rudder
- Test controls
- Walk 35 feet from your plane and continue to test controls (watch for glitches)
- Take two minutes to visualize your flight plan from take-off to landing
Take-Off:
- Determine the direction of the wind (Note: you MUST take-off and land into the wind)
- Give yourself a runway of 40 plus feet (width of a baseball field)
- Turn on your timer/alarm so that you know when your battery is low and you must land
- Give full UP elevator (hold that position)
- Give 50% throttle to allow tires to grip ground and get plane going straight and solid
- Give 100% power
- Once plane lifts from ground RELEASE up elevator
- Climb slowly and fly in a straight (if you must turn make it VERY wide)
The Flight:
- Reach an altitude of no less than 60 feet (you want to be 3 mistakes high. 1 mistake is 25 feet)
- Fly in a big square making right turns and follow this for a while, then switch up and make left turns
- Set your trim so your plane flies straight and level at 70% power
- Note: any time you turn sharper than 90 degrees you will loose altitude
- Use the throttle speed to climb, drop, or maintain altitude
The best advice I can give you is "let the plane fly itself. Steer it ONLY when you have to."
The Landing (read the "how to land" article of masportaviator.com):
This will sound crazy . . .
- fly your plane to the ground
- up elevator will SLOW your plane down
- the throttle/speed will make your nose dive or level out, you will need to give speed to your plane to get the nose to lift a little, BUT beware this will NOT make your plane go faster
Here's how to do it:
- Continue to fly your flight plan, but on each pass (straight away) cut power by 15-20%
- When you are 15 feet from the ground make a big turn towards the wind
- Slow the throttle down more, but not so much as to drop the nose
- Fly in a long straight line to the ground
- When you are 3 feet above the ground, cut power and give up elevator
- The plane will land itself
- Now turn off receiver first and then the transmitter
Note: for your safety and wallet make sure to always (1) turn transmitter ON first and then receiver/ airplane and (2) to turn OFF receiver first and then transmitter. While bench testing my newest plane, before its maiden flight, I forgot to act on this rule and within seconds smoke rised from my plane. I burned out my speed control. The prop was locked against my leg. If the prop had not been locked, I would have been cut up to boot!
Remember to be modest with the controls. Over sticking will definitely cause you to crash.
Wednesday, November 08, 2006
How to be sucessful with your maiden voyage
Labels:
electric airplane,
micro airplane,
parkflyer,
rc,
rc airplane,
remote control
Subscribe to:
Post Comments (Atom)

No comments:
Post a Comment