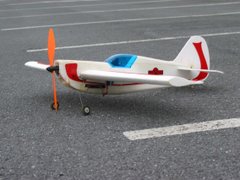
Interested in making functional snow skis for your electric RC or free flight airplane? If so, I have instructions and photos how on my retired and sister blog. You will find a handful of videos there as well as home-made free flight airplanes.
For mounting your skis on large scale free flight or your RC review this post. The photos will prove very helpful. Note: your spring should not be bent on the Du-Bro skis as pictured. That was my error when installing that specific ski. The other one was done correct and the spring was not bent -- it was straight.
Tuesday, January 08, 2008
Tuesday, January 01, 2008
Homemade Micro RC Airplane
On those weekend mornings, with no wind and a nice cup-o-joe in your hand you probably stare out the window to your backyard and wish you were flying. You can.
Here's what you need:
$13 -- an A drive 4:1 IPS series GWS geared motor
$2 -- 5.43 prop
$15-30 -- 7.4volt 350 mah 2 cell lipo batt
$6/each -- Qty: 2 Blue Arrow micro servo BA-TS-3.6
$15 -- Blue Arrow R3P5-H/T receiver w/ crystal
$25 -- Pixie-7 Castle Creations ESC
$6 -- Du-Bro micro servo arms package
$9 -- Harbor Freight Tools electric free flight airplane
$97 -- Grand total
Notes:
1) Use your lipo charger and your transmitter.
2) The electronics go on sale and can be found for the prices I listed.
The important thing to remember is all of this stuff is reusable and if you completely destroy your plane you can have a new one for $9.00. I am also building a balsa wood backyard/indoor flyer that will use all of these components except the motor so this investment is considered long-term and the guts will get reused in many different aircraft.
I see these planes as great indoor and backyard combat flyers that you and your friends could enjoy over beers and your summer BBQs.
For reassembly:
1) Consider white glue as opposed to epoxy or CA glue as it weighs lighter and it will be easy to seperate the fuse halves and get to the components when you gut the plane.
2) Build a balsa firewall and use epoxy to mount it. Then screw the motor to the firewall.
3) Use white glue or canopy glue for reattaching the plastic canopy.
4) Use double stick tape or velcro to mount the servos and receiver.
5) Cut a grove into the fuse that your lipo can mount into vertically. Use velcro to mount it. You may need to build a balsa wall for the velcro to attach to.
6) Build balsa wood supports for wings and control surfaces and get rid of all plastic ones.
7) Get the CG down before you reseal up the fuse completely.
8) For the section where the original battery/charger mounts you can carve and shape with very fine grit sand paper a piece foam to glue into that place.
9) Consider making a hatch to give yourself access to the guts.
Subscribe to:
Comments (Atom)
