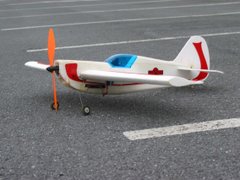
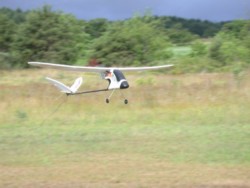
My second plane is a EPP foamie: "The Potensky Eagle". I have replaced the ESC (electric speed control) with a Great Plance C-12 and put a EPS350 motor/gearbox (5.33x1) and a slowflyer large prop on it after a nose dive broke the gear drive. It does not have the power that I want, but does fly slowly and gives me the opportunity to practice my aerobatics. Below is a Youtube.com video of the Eagle. Other videos are also posted, just search for "Quiet Flyer".
My third plane is another foamie -- the Copperhead Extra Stiffy with a brushless motor. This plane will be put me in a whole new league of performance. But first I want to master my Eagle.
Saturday, January 13, 2007
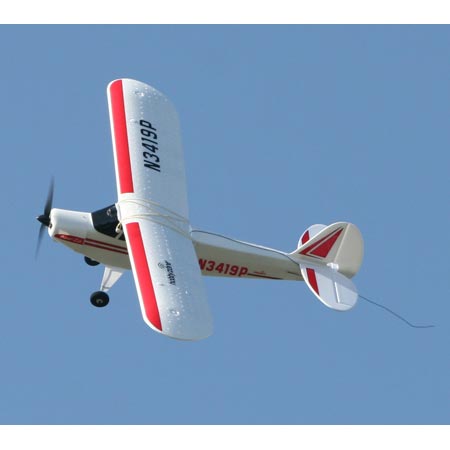
Nice Flight: Hobbyzone Scout
Dave has gotten used to his Hobbyzone Scout, which out-performs his Hobbyzone Outlaw he replaced. The Scout is much more sensitive to turns because the V-tail control direction as opposed to two motors (like the Yellow Bee in the earlier post). The Scout is a bit quick, but flies stable and confidently allowing Dave to fly at very low altitudes confidently. The plane has good power and can climb at a decent angle to gain altitude.
How to avoid a crash
There are two key points to remember when flying regarding avoiding crashes:
The first is to fly at three mistakes high -- each mistake is 25 feet high. The idea being that if you loose control doing a stunt you will loose altitude to 50 feet in the air and then take an additional 25 feet to recover control; therefore you gain control 25 feet of the ground, which is a safe altitude. If you are closer to the ground it is likely you will crash.
Dave flew three mistakes high and cut motor while giving full left turn to cause the plane to spiral. His mistake was when it lost control he did NOT let off the controls (which would self correct itself); rather he gave full power to pull out. It did not work
The second is to know that the plane always wants to self-correct itself. This means that the plane WANTS to fly level and straight. Beginner RC airplanes and most full scale personal planes are great at this. What you must do is zero out all your controls -- absolutely no throttle or turning or elevator. The plane correct irself given you have adequate height.
If you are too close to the ground, you will need to decide what's the best approach, i.e. full power and full up elevator (what ever you do give the radio the is opposite of what the plane is doing. So if the plane is headed downward in a left spiral give up/right to counter correct.
Sunday, January 07, 2007
Test Flight #2 -- Hobbyzone Scout
Dave's first test flight was a success, but he flew on too windy of a day and ended up down-wind and could not bring it back; therefore he lost it over a residential neighborhood. He recovered it after it had crashed into a tree and smack against the concrete. His wing was snapped in half. He bought a replacement, not stock, which is slightly larger.
He complained that the plane seemed to lack power. He informed me that he charged his NiMH batteries two weeks ago. Note: NiMH batteries loose power over time and it is best to charge the night before or day of so you have the batteries at full capacity.
Dave hand launched since he could not find his wheels. His plane took off nicely. I suspect with a battery charged at full capacity it would climb a little more quickly.
As suspected the Hobbyzone Scout is a stable flyer. It's best to have a large field and windless day to get use to its behaviors.
It makes a great first airplane if you are unsure if the hobby is one you will be in for the long haul, because at $50 it is something you could walk away from.
Friday, December 29, 2006
Backyard micro flight
 After we've been flying successfully for a while, we all get the itch to fly more often! Without dispute, in the rc community (at least online) the most inexpensive "scratch" is the AirHogs Aero Ace, which can be purchased for between $25-$29 at Target, Toys-R-Us, and K-Mart (watch for coupons for 10%). What makes these little planes better than the rest is it has differianted speed control; others only have speed #1, speed #2, and speed #3 buttons. Don't buy any other version -- trust me, I did and I was disappointed. The Aero Ace comes as a bi-plane and a jet.
Available at aeroacemods.com are all sorts of upgrades, including wheels (it will ROG -- roll off ground) and night lights. I often use the night lights to fly in my backyard:I usually can climb about 40-50 feet high on a no-wind evening and have a seven minute flight with "throttle maintenance."
In the picture above I added floats to my Aero Ace. You need styrafoam, hobby knife, fine grit sandpaper, balsa, and waterproof glue -- and a hot glue gun to mount the floats. The secret is to make the floats as small as possible in every way, but length. Floats should be 70-75% the length of the plane. CG (Center of Gravity) is tricky, but a visit to the forums at rcuniverse.com or rcgroups.com will be very helpful. Keep playing with it until it flies stable. My plane is a bit rocky and nose heavy, but some adjustments should result in better flight.
Sunday, December 24, 2006
2-Channel Woes
I am not a big fan of 2-channel RC airplanes, because of the lack of control with altitude. If you are in a bad situation, climbing or diving quickly is not possible and furthermore, forget about trying to do basic aerobatics. But nonetheless, they are fun inexpensive planes. I own a SDM Yellow Bee and I use it for testing new things out, like home-made floats. It's my guinea pig.
 Dave recently replaced his Hobbyzone Firebird Outlaw with a Firebird Scout. His maiden flight was in 7 MPH winds. As nearly an intermediate pilot, he has the skill to fly in these conditions. But sadly, he got behind the wind and was not able to bring the plane to the landing strip (baseball diamond). He was swept over a neighborhood house and crashed into a tree and the plane fell upside down and snapped its wings. In less wind, this plane would perform very nicely. It is a SMALL plane.
 I did not fair so well with my SDM Yellow Bee (can be bought for $25-29 at your local Harbor Freight Tools) either. The wind was throwing me all over the place. I was trying to keep my flight very close to the baseball diamond so Dave could video tape it. Low level flight in high winds is not easy. And I eventually got caught with the wind behind me and almost crashed into the dug-out box behind me in the photo. I just missed hitting it head on by about 2 feet.
 As you can see from the photo to the right I sustained very little damage. A broken V-tail and prop. With 5-minute epoxy and packaging tape this plane will be as good as new in less than 7 minutes and will fly as if this crash never happened. If I had my 4-channel plane I don't believe I would have ever been in this situation with a near death experience for the plane. I am replacing the gearbox on my 4-channel foamie and hope to have some posts up for you to view.
Moral of this story: know the limits of your 2-channel airplane and only fly in conditions that you know with absolute certainty you can handle. Wait a few days if that's what it takes for the weather to let up. Contrary to what I believed when I first started flying, flying in all weather conditions does not make you a better and more succesful pilot, but rather proves you level of impatience and the only thing you will master is repairing your airplane and questioning why you went up in the first place. I destroyed three airplanes now, but have finally learned to be patient.
Wednesday, November 08, 2006
How to be sucessful with your maiden voyage
After you have purchased your brand new rc airplane and have followed the directions, such as charging the batteries and "trimming" the elevator and rudder you're ready to FLY! Now you need to find a large field (about the size of a football field) with a well-manicured baseball diamond or a connected parking lot. Check the hourly weather forecast on accuweather.com. Do NOT fly in winds over 3 mph on your first flights. If the flag on the flagpole at the school is moving it is TOO windy.
There are four steps that every pilot most complete to have a successful flight: (1) pre-flight check (2) take-off or hand launch (3) fly at a safe altitude and (4) landing. By far the most challenging step is landing and then taking-off. In this post I will break down each step and tell you what you must do to make your maiden voyage and every flight afterwards a success (but please note: we all crash, no matter if we have been flying for 2 minutes or twenty years. This is a fact and a reality of the hobby).
Pre-Flight Check (in this order):
- Turn transmitter on (put throttle at neutral)
- Turn on plane or plug in battery
- Check the "trim" for the elevator and rudder
- Test controls
- Walk 35 feet from your plane and continue to test controls (watch for glitches)
- Take two minutes to visualize your flight plan from take-off to landing
Take-Off:
- Determine the direction of the wind (Note: you MUST take-off and land into the wind)
- Give yourself a runway of 40 plus feet (width of a baseball field)
- Turn on your timer/alarm so that you know when your battery is low and you must land
- Give full UP elevator (hold that position)
- Give 50% throttle to allow tires to grip ground and get plane going straight and solid
- Give 100% power
- Once plane lifts from ground RELEASE up elevator
- Climb slowly and fly in a straight (if you must turn make it VERY wide)
The Flight:
- Reach an altitude of no less than 60 feet (you want to be 3 mistakes high. 1 mistake is 25 feet)
- Fly in a big square making right turns and follow this for a while, then switch up and make left turns
- Set your trim so your plane flies straight and level at 70% power
- Note: any time you turn sharper than 90 degrees you will loose altitude
- Use the throttle speed to climb, drop, or maintain altitude
The best advice I can give you is "let the plane fly itself. Steer it ONLY when you have to."
The Landing (read the "how to land" article of masportaviator.com):
This will sound crazy . . .
- fly your plane to the ground
- up elevator will SLOW your plane down
- the throttle/speed will make your nose dive or level out, you will need to give speed to your plane to get the nose to lift a little, BUT beware this will NOT make your plane go faster
Here's how to do it:
- Continue to fly your flight plan, but on each pass (straight away) cut power by 15-20%
- When you are 15 feet from the ground make a big turn towards the wind
- Slow the throttle down more, but not so much as to drop the nose
- Fly in a long straight line to the ground
- When you are 3 feet above the ground, cut power and give up elevator
- The plane will land itself
- Now turn off receiver first and then the transmitter
Note: for your safety and wallet make sure to always (1) turn transmitter ON first and then receiver/ airplane and (2) to turn OFF receiver first and then transmitter. While bench testing my newest plane, before its maiden flight, I forgot to act on this rule and within seconds smoke rised from my plane. I burned out my speed control. The prop was locked against my leg. If the prop had not been locked, I would have been cut up to boot!
Remember to be modest with the controls. Over sticking will definitely cause you to crash.
Friday, November 03, 2006
Which rc airplane should I buy?
 Choosing your first remote control airplane can be a daunting task. Experience has taught me that this choice is based on two questions, which each aspiring pilot must answer for him/herself. Those questions are (1) how much money am I willing to spend and (2) is this a short or long-term investment for me? The answers to these two questions will help you focus your research, resulting in the best first airplane. This post will offer you a few affordable entry-level park flyers with brushed motors, which can be flown at your local high school football field.
The most basic airplane can be purchased for under $50 and will include all you need to get your bird in the air. The most trusted brand that I have flown is Hobbyzone. I have seen these planes crash into fences, trees, and walls and be back in the air within minutes. I can't speak highly enough about these planes. My friend Dave, a fellow pilot, learned to fly using his Hobbyzone Firebird Outlaw (see video below).
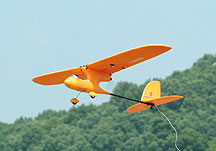
 The Firebird Outlaw, which Dave flew has been discontinued and replaced by the Firebird Scout, pictured left. You can find a review and video of the Scout on masportaviator.com.
There are two negatives to these types of airplanes: (1) you can not reuse the electrical components inside if you destroy the plane and (2) they are 2-channel airplanes, which means 1-channel is dedicated to the "throttle" for the motor speed (which correlates with altitude) and the other channel is dedicated to "turning." What this means is the plane does not have an elevator and the only way to bring it back down to the ground is by slowing the motor speed -- if you are down wind on a windy day you will not be able to fly back to yourself.
$50 RTF (Ready-To-Fly) planes are perfect for those with a smaller budget, who are not sure if the hobby is for them. These planes also make great first planes for youngsters.
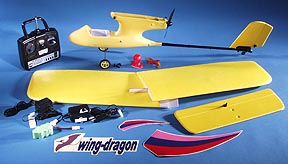 The next level of investment is $89. This is the plane that I recommend most for under $100. The plane is called the Wing Dragon and is sold by hobby-lobby.com. At times, it goes on sale for $79. This package is very complete. It includes both a wall and car charger for the battery. And most importantly it includes a flight simulator, which allows you to plug the radio into your PC and fly the Wing Dragon and many models on your computer before taking it to the sky. Thirty minutes spent on a flight simulator, prior to your maiden
voyage will help you immensely -- it increases your chances of a successful flight. I have personally flown this plane & the flight simulator and I am very impressed with both of them. The Wing Dragon is a 3-channel plane, which offers you full control of the aircraft. Furthermore, it is extremely durable. I have seen this plane fly 15 mph head-on into a parking lot curb and not incur any permanent damage. It has great flight characteristics. Hobbyzone also offers 3-channel planes, but they cost $140 on up; therefore for the money the Wing Dragon cannot be beat. You can find videos and a few reviews of the Wing Dragon at hobby-lobby.com.
 For $160 you can purchase a 3-channel Hobbyzone Super Cub, which is a beautiful airplane and a perfect first plane. It offers you full control with throttle, rudder, and elevator. All Hobbyzone planes come with an anti-crash technology installed to better help beginner pilots fly and there is a switch for "advanced" pilot controls. Reviews of this airplane are positive.
But, before you commit to the Cub, you should also be aware that there is 4-channel Wing
 Dragon available for $140 and often less when on sale. 4-channels gives you throttle, rudder, elevator, and aileron – simply put a whole lot more control over the aircraft. The Wing Dragon 4 is capable of aerobatic flight, including inverted flight. This plane can serve as both your first and second plane, because it is 4-channel and the wings will dip when you turn and you will need to adjust the altitude accordingly. But, beware that will be more difficult to learn on than a 3-channel plane. In the long run you will save yourself $150 or more because you will NOT be buying a second plane with an additional channel -- ailerons. The Wing Dragon 4 includes the flight simulator and chargers too. Videos and photos are available at hobby-lobby.com.
The last level is for serious enthusiasts, who are committed for the long haul. My first plane and equipment cost about $450. I researched the planes I would like to grow into and identified what radio receiver and servos were required. I decided that I would buy a 5-channel computerized radio from the start so I would not need to upgrade my radio when I upgraded to a second or third airplane. I also bought a charger that would be able to charge many different types of batteries so I didn’t need to keep purchasing additional chargers every time I bought a new plane. I have three planes now and my radio works for all of them. I invested money upfront so I could save money in the long run.
There are so many planes to choose from at this level. I recommend that you purchase an airplane (1) made of extremely tough EPP foam, which is very easy to repair (2) with a wingspan of at least 35 inches, (3) has 3-channels: rudder, elevator, and throttle, and finally (4) has a dihedral top-mounted wing, which will provide the most stability and be forgiving in flight. Avoid ailerons to start. Avoid balsa wood planes or gas powered as well. A great plane to consider is the “Wingo USA” sold by hobby-lobby.com. You can even purchase floats for this plane and take off from and land on water.
I have spoken with many experienced pilots who regret starting off with a beautiful nitro plane as their first planes. Those planes make great third or forth upgrades. Also, please remember in this hobby you get what you pay for. Make sure to research and purchase the best plane your money can buy. If you can not find a review or a forum on the desired model at rcuninverse.com, rcworld.com, or E-Zone Mag -- don't buy it. A fellow pilot made the mistake of not purchasing a trusted brand for $80 for a 3-channel and has invested an additional $35-40 and hours of his time. In his case, purchasing a model for $80 like the Wing Dragon would have saved him a good amount of money and heart ache. For your first plane don't worry about the looks or being a "scaled model"; rather focus on stable flight characteristics and durability. You want a reliable plane to learn on.
 Bottom line -- if you plan to fly your rc airplane for the next two years, the Wing Dragon USA would be your best choice for multiple reasons: (1) easy to learn to fly on (2) super tough and easy to repair (4) spare parts available (4) versatile . . . land/water (5) will remain challenging for a couple years to fly and (6) when you upgrade your plane you can reuse the components. Check out the review and videos on rcgroups.com. There is a great video of water take-offs and landings.
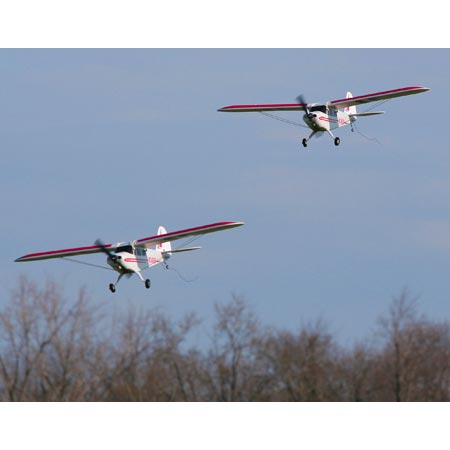
Powerful resources for you is your local RC airplane club and hobby store -- as well as rcuniverse.com, ezone mag, and masportaviator. Consider joining your local club! They will be able to train you to fly, just like driver’s ed, plugged into your radio. Many clubs have a club plane they use to teach people just like you.
Please feel free to post a comment and ask questions or make suggestions.
Where I started from
Three years ago, after a 17-year hiatus from the hobby, I returned to the hobby of flying remote control airplanes. Since then I have acquired near 1,000 hours in obsessive and passionate research on electric powered remote control airplanes. When I first returned to the hobby I did not want (1) to nose dive and destroy an expensive gas motor, (2) limit where and when I could fly, and (3) I did not want to join a club and be a member of the AMA; therefore I opted to buy a electric foamie plane with a brushed motor. Since then I have learned and would do a few things differently. The goal of this site is to share what I have learned along the way so that you can make more educated decisions in your RC experiences.
Subscribe to:
Posts (Atom)