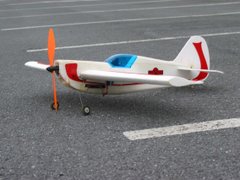
Using a $1.99 rubber-band powered P-51 Mustang I bought from Harbor Freight Tools along with the guts from an Air Hogs Aero Ace I created a 2-channel micro flyer.
 Above you can see the charging mechanism cut and installed into the fuselage. Below you will see the same with the li-po battery. I used hot glue to secure them.
 Using a Xacto blade I cut slits in the styrafoam to lock/protect the wires and to avoid them dangling, which could catch something on landing.
 I started this project with a Combo package (see below) I bought on clearance from Target for $17.00. I intended to create a flying wing micro flyer, which I expect would be a rather quick plane.
 I scrapped this idea because I do not know enough about CG (center of gravity) for flying wings; therefore I will research this further and use another Aero Ace to build this plane.
 First, remove the top wing on the Aero Ace and then using your thumb and index finger slowly thumb it apart from the nose back. It is glued together with rubber cement. That goo will be left on the parts and engines -- just re-stick it. It will stay. Or you can use a small amount of hot glue.
 Be very careful when removing the guts, especially the antennae (which goes through the rudder)! Take your time and pull gently!!
 The video at the top of this posts explains "how to" as well.

2 comments:
Retarted
idioit
misspeliling
I seldom comment, but i did some searching and wound up here "Homemade Micro RC Airplane".
And I do have 2 questions for you if you don't mind. Could it be just me or does it appear like a few of the comments look like written by brain dead individuals? :-P And, if you are posting at other online social sites, I would like to follow anything new you have to post. Could you make a list of all of your community pages like your Facebook page, twitter feed, or linkedin profile?
Also visit my page browse the website
Post a Comment