 My friend, Dave, can be a maverick pilot at times. And this time he took a nose dive from 25-30 feet up. He's a good guy. He's buying me a replacement Yellow Bee. In meantime, since he is the new owner, I thought I'd repair it and give it to him in a usable-state. But beware, the plane is much less forgiving even to gentle crashes now.
 The first thing you do is "dry fit" all of the parts and think about how to best repair the plane. I used 5-Minute Epoxy, duct tape, and packaging tape. The dry fit went well, but I had a little trouble getting everything to align up perfectly once I began gluing.
 When ever you are gluing your broken plane back together, regardless if it is plastic or Styrofoam, ONLY GLUE ONE EDGE AT A TIME. This will help you align it perfectly. If you try to to glue it all at once and one little part is not aligned the structural integrity of your repair job will be compromised. I always go in steps, often gluing in five or more stages -- even for small pieces. I do a little here and a little there. Low key and no stress. In the picture above I used duct tape (had to shorten it) to tape the inside of the canopy to hold the seal tight.
 After I glued one side I added duct tape to the external part of the cockpit to hold it in place. You can use painter's tape too. Once it dried, I glued the bottom end of the fuselage together and then finally glued the other side -- this clockwise gluing technique allows me to align each corner as I glue, resulting in a smooth and aligned repair job.
 I then sealed the seems with duct tape -- careful to not use too much as it adds weight. Also, remember that Epoxy is tough and weighs a lot -- so be conservative with it. You need a lot than you think. It will hold up and crashes will likely break anywhere, but along the Epoxy seem.
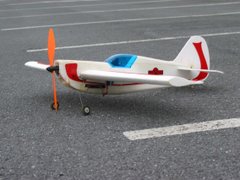
 Finally I reinforced the two sides and the bottom with packaging tape and used my Xacto blade to clean off excess. I do endorse the use of packaging tape for repair jobs, but with cheaper "throw away airplanes," like this one, I think it is okay.
This plane will fly again. The number of flights will be determined on the ease of landings. If the plane never has a mild to hard crash again it will last a long time. After it is dead, you can gut it and make a SPAD (Google it) RC airplane or you can buy a cheap small free flight styrofoam plane, the ones you had when you were a kid, and build your own plane. I recently bought a few at the Dollar Tree just for that reason. Some day they will be home-made RC airplanes -- maybe used for combat fights. I like to recycle what I can.
1 comment:
Looks good! You're a top notch plastic surgeon.
Post a Comment